Growing Mint in Containers (and How I Trained Mine Into a Cute Little Topiary)
Mint is a beast in the garden. It’ll happily take over if you let it—which is why I grow mine in containers. It keeps things tidy, easy to manage, and bonus: it looks great. I’ve tested a few methods over the years, and I’ve landed on a setup that works. In this post, I’ll walk you through how to grow mint in pots the right way—then show you how I took it one step further by shaping it into a tidy little mint topiary. It’s easier than it sounds, and yep—you can still harvest from it.

Why Mint Belongs in a Container
Mint is an enthusiastic grower—like, really enthusiastic. Once planted in the ground, it spreads fast, sending out runners that pop up everywhere you didn’t plan for. Containers keep that growth in check.
They also let you control the environment: from the soil mix to how much sun and water it gets. If you're growing different varieties (like a citrusy orange mint I love for minty summer drinks), giving each plant its own pot keeps things simpler. It’s also easier to manage seasonal changes—especially if you want to keep your mint going through winter without guessing whether it’ll survive frost.
Growing mint in a pot isn’t just about control—it’s about healthier, better-tasting harvests and a more flexible setup for your space.
What Container Works Best
The best container for mint is one that’s 10–12 inches wide and has solid drainage. Mint likes consistent moisture, but it hates sitting in soggy soil—so drainage holes are non-negotiable.
I personally go for terra cotta or ceramic pots. They’re breathable, help prevent overwatering, and look great indoors or out. Plastic works in a pinch, but it tends to dry out too fast unless you’re really on top of your watering schedule (especially if your mint is in a hot, sunny spot—more on that in the mint sunlight guide section coming up).
Self-watering containers? I don’t recommend them for mint unless you’ve already dialed in your watering rhythm. They can hold too much moisture, which risks root rot—especially if your mint plant is starting to flower, which is when it needs more attention to thrive.
If you’re growing a more decorative variety—like fragrant orange mint or shaping it into a topiary—choosing the right pot also makes training and trimming easier over time. A heavier pot adds stability as your plant fills in.

Soil + Setup Tips
Mint likes its roots to breathe. Start with a lightweight potting mix—skip the garden soil, which holds water and compacts too easily. I usually start with a basic indoor/outdoor potting mix and mix in perlite or orchid bark for better drainage.
You’re aiming for consistently damp soil—not soaked, not dusty. Too much water, especially in containers without airflow, can quickly lead to root rot. (My mint watering guide has the tricks I use to avoid that—no moisture meter required.)
If you’re growing a specialty type like mojito mint, good drainage also helps preserve that sharp, clean flavor. And if you’re shaping your plant into a topiary, light, loose soil makes it easier to adjust the stake and keep the roots happy while you’re training it.

Light + Water
Mint loves the sun—but not too much. Aim for 4–6 hours of bright light each day. Outdoors, morning sun with a bit of afternoon shade works great. Indoors, a sunny windowsill or grow light setup will do the trick. If you're unsure how much is too much (or not enough), I break it all down in my mint sunlight guide based on where you're growing and the season.
As for watering: mint prefers consistent moisture, but it really doesn’t like wet feet. I water when the top inch of soil feels dry—more often in hot weather, less when it’s cooler or cloudy. If you're unsure, check my full mint watering guide for signs that it’s thirsty vs. overwatered (hint: wilted leaves can mean either, which is annoying but true).
Growing mint in containers also makes it easier to overwinter your mint. In colder climates, you can move the pot into a garage, basement, or windowsill to help it survive winter. Just cut it back and keep the soil barely moist—it’ll go dormant and bounce back in spring.

How to Keep Mint Bushy
The secret to full, leafy mint? Frequent pinching. I pinch mine back weekly, even if I’m not using it. It keeps the plant compact and encourages new growth from the lower nodes—otherwise it shoots up fast and starts looking scraggly.
Always harvest from the top few sets of leaves, not just around the sides. Taking too much from one area can throw off the shape and stress the plant. If you notice it getting leggy or sparse in the middle, don’t panic—just cut it back hard to 3–4 inches tall. It’ll sulk for a few days, then bounce back bushier than before.
Also, keep an eye out for Mint's flower buds. Once mint starts to flower, it shifts energy away from leaf production and the flavor can get bitter. You can learn more about what it means when herb plants flower, and why snipping those buds early is key if you want lush growth and good flavor.
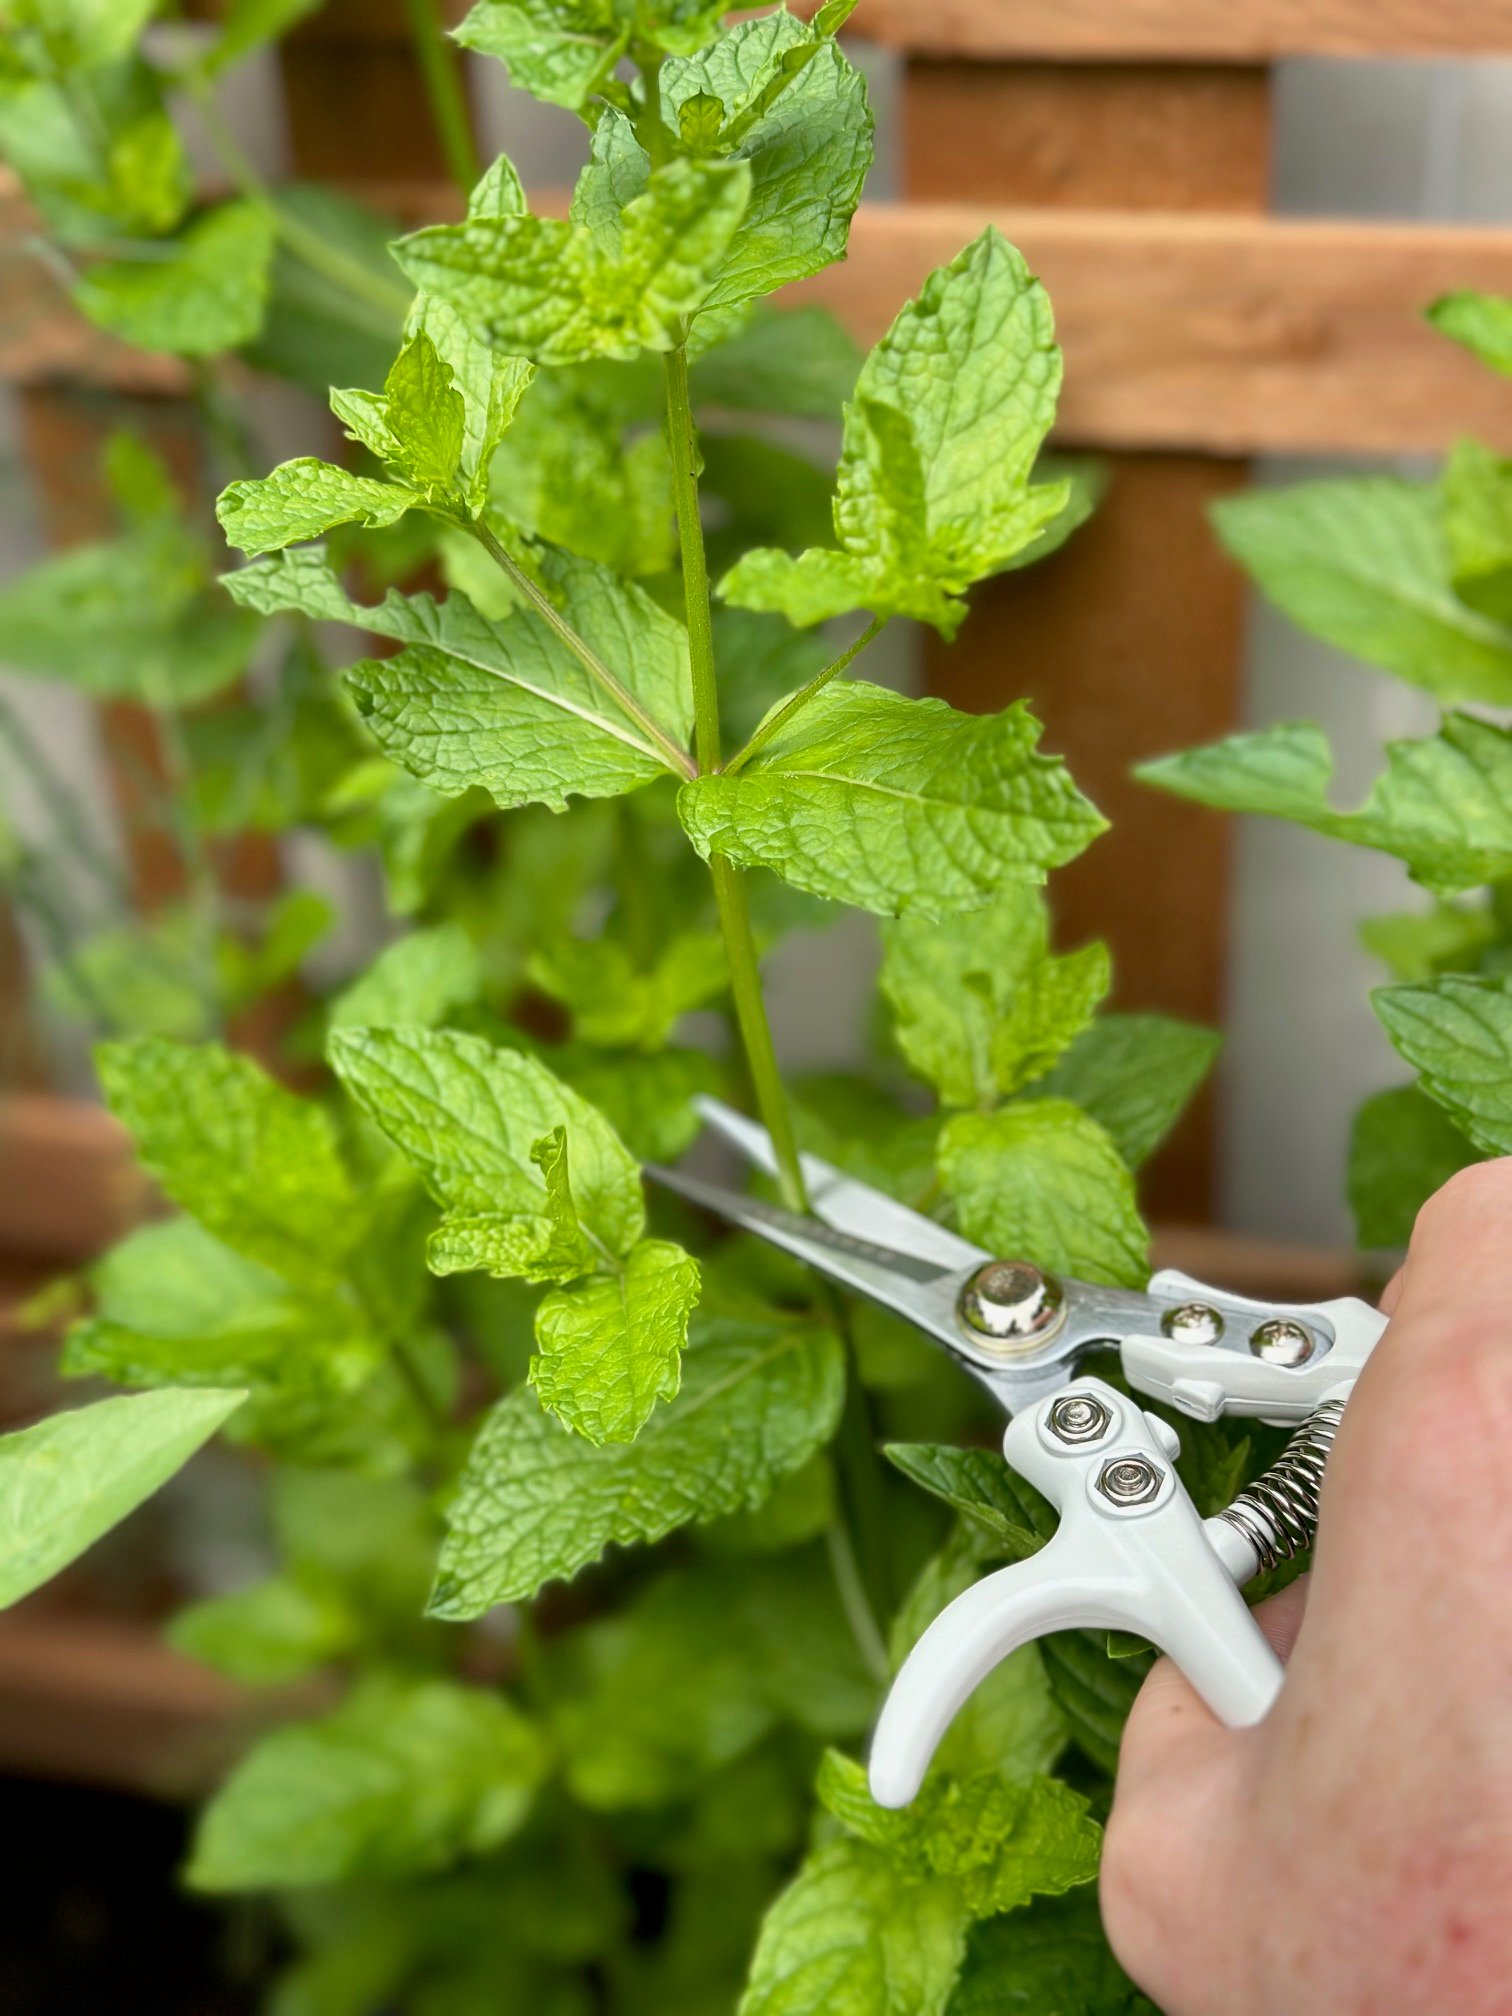
Tip: I always cut mint just above a pair of leaf nodes—that’s the spot where two new stems will grow. It’s the easiest way to keep the plant full without overthinking it. Snipping just above those leaves encourages bushier growth, and you'll start seeing those new shoots within a few days. Miss the node, and you’ll usually end up with a long stem and no side growth.
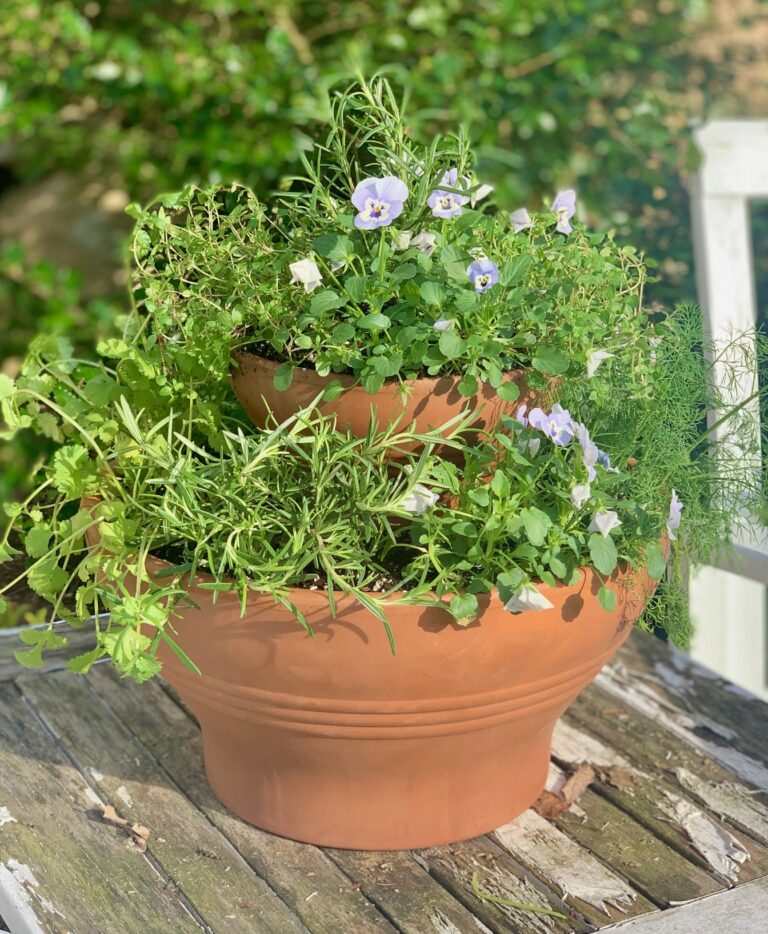
Turning It Into a Topiary (Optional but Fun)
Gathering materials:
- Clay pot (I used a 10")
- Soil
- Grapevine wreath (I used a 12" wreath)
- 2 - 4" mint plants
Step-by-step instructions:
- Prepare the pot
Fill your pot with soil, leaving space for the plants. Water the soil before planting.

- Plant the mint
Use mint plants with long, flexible stems. Place one at 9 o’clock, the other at 3 o’clock. Angle the stems outward over the pot’s edge.

- Position the wreath
Stand the grapevine wreath upright at a slight angle (think 8 and 2 o’clock). This keeps it near the plants without crushing them.

- Secure the wreath
Use U-shaped wire pieces to anchor the wreath in place, weaving through the grapevine and into the soil.

- Begin training
Gently wrap the longest mint stems around the wreath to start the shape. As new growth appears, continue wrapping it around.


How to Care for Your Mint Topiary
- Train regularly: As your mint grows, wrap new stems around the wreath and secure with soft twine if needed.
- Encourage bushiness: Pinch back tips often to promote branching and shape.
- Prune as needed: Remove any dead or overgrown stems to keep the form clean and balanced.


Frequently Asked Questions
Yes—pretty much every variety of mint does well in a pot. From common spearmint to specialty types like pineapple mint, chocolate mint and orange mint, container growing helps keep their aggressive roots contained and their flavors distinct (especially if you're growing more than one type nearby).
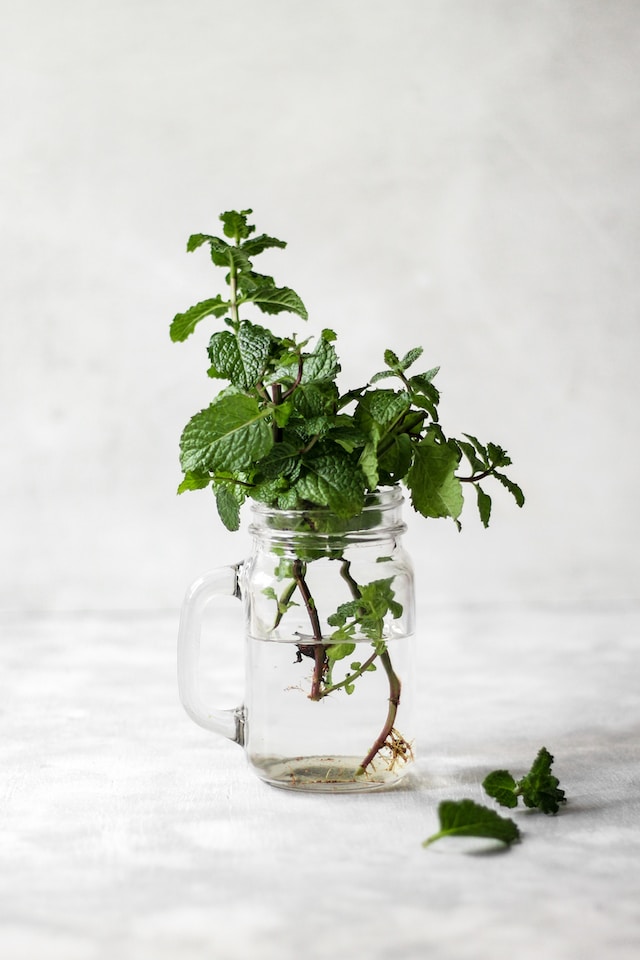
About once a year is ideal. Mint’s roots can get dense and tangled fast, even in a roomy pot. I usually divide mine in early spring—just lift the whole root ball out, split it in half (or thirds), and replant the healthiest sections. Fresh soil and a slightly bigger container if needed can give your plant a second wind. If your mint starts drying out faster than usual or stops producing full leaves, it’s likely time to refresh the setup.
That depends on your climate. Mint is a hardy perennial in zones 3–11, but if you live somewhere with cold winters (like I do in Massachusetts), your container mint will need a little help. Either move the pot to a protected spot like a garage or porch, or cut it back and mulch heavily. In very cold areas, bringing it inside might be the best bet. More details on how to help mint survive winter here.
Yes! Both terms refer to the same thing - a mint plant that's been trained to grow upright with a single stem and a rounded, tree-like shape on top. "Mint topiary" is the technically correct term in gardening circles (a topiary is any plant shaped through pruning), while "mint tree" is a more casual, descriptive name that many home gardeners use. Either way, we're talking about the same plant with the same care requirements. I use both terms interchangeably in my garden journal, just like I do with my lavender tree (which is also technically a lavender topiary!)


Initial Planting 1 Month's Growth of my Mint Tree
Get creative with your next harvest — find more herb projects in the Herb Index.
Once your potted mint begins to thrive be sure to harvest some to make my Easy Mint, Cantaloup and Fontina Pasta Salad or some delicious Blackberry Ricotta Artisan Toast!
For more herb plant projects, try your hand at crafting a lavender tree. They're elegant, fragrant, and surprisingly easy to make with a little patience.
Growing mint in containers—especially when shaped into a charming mint tree topiary—is a simple, satisfying project that adds beauty and fragrance to your space. With the right care and a little patience, your mint will thrive all season long.
Have fun with this one!